
How to Configure site to site vpn ?
Setting site to site VPN consist of three major steps.
    1. Setting up the vpn server on Nebero admin panel(Server Side).
    2. Creating vpn client on Nebero admin panel(Server Side).
    3. VPN client configuration on Client panel(Client Side).
In order to create site to site vpn you need to access nebero admin Panel.
After accessing nebero admin panel Click VPN Server Click Server Setup
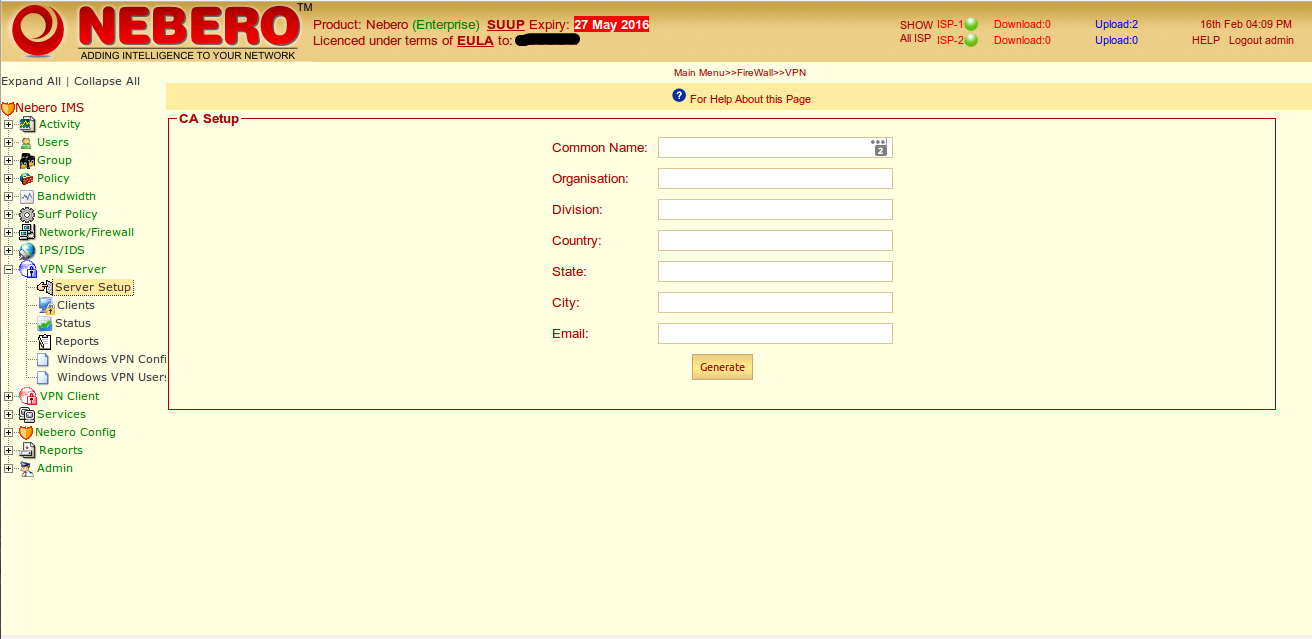
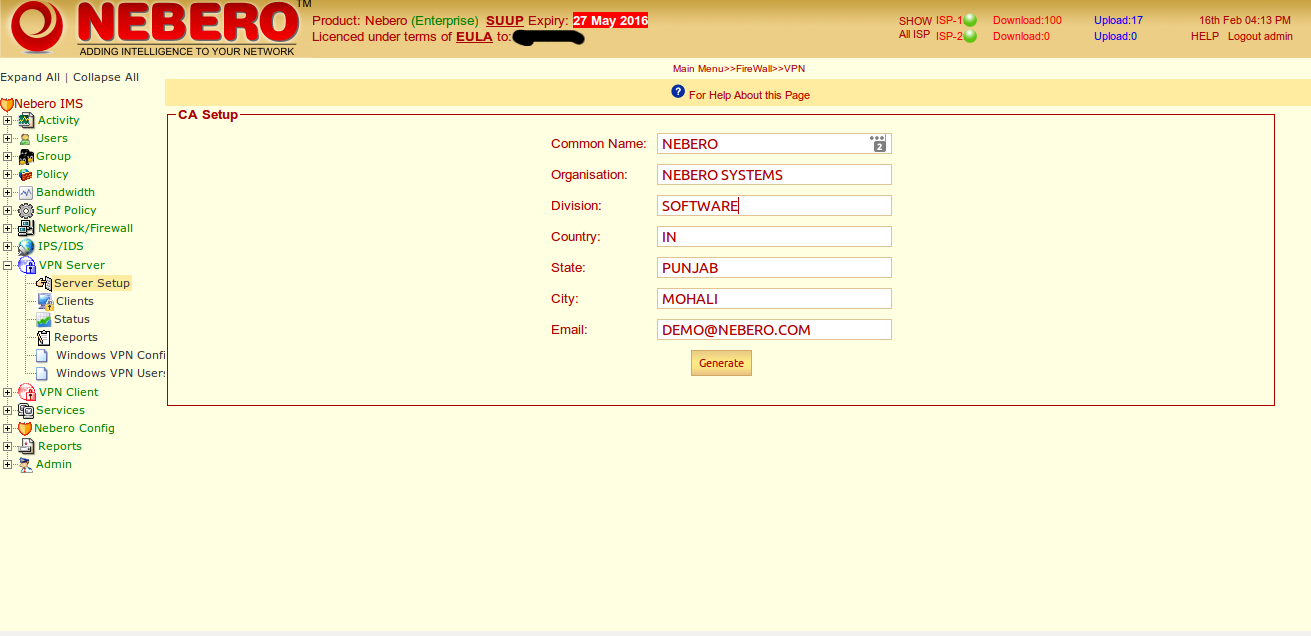
Fill all Information for CA certificate Setup.After all info filled click on Generate button.
After filling the details.Click on Generate button.
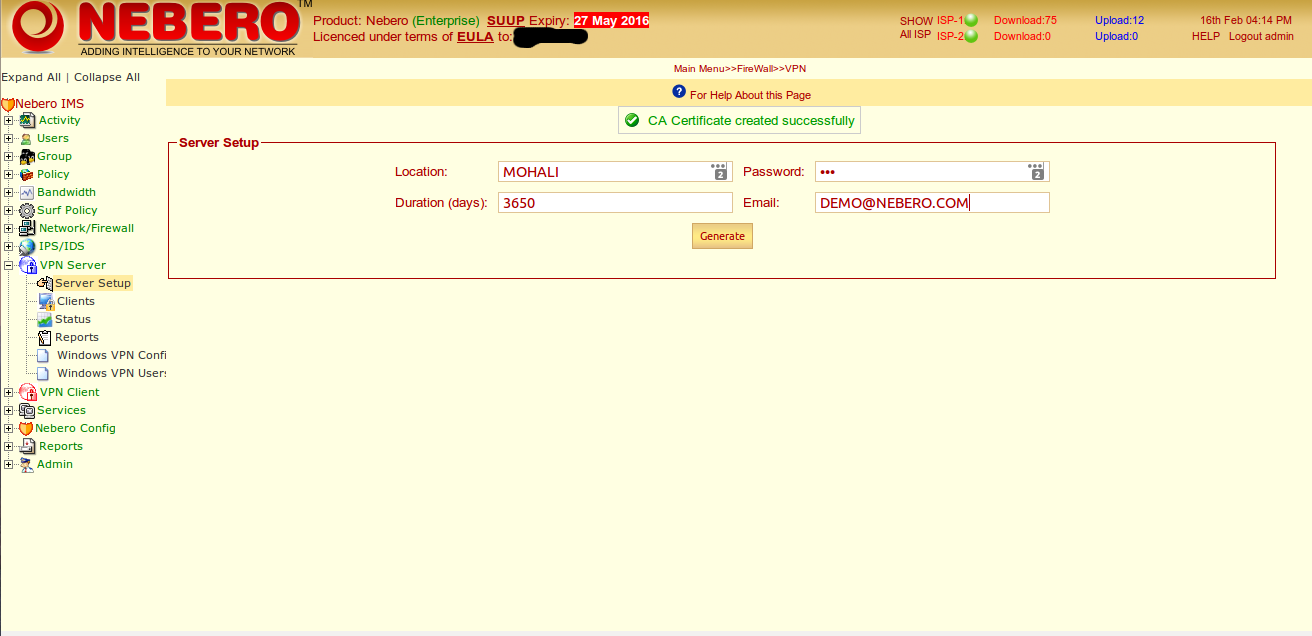
After the sever certificate generated sucessfully.You need to start the services of vpn server by clicking on green Button and it status will be changed from Stopped to Running
Brief description of VPN Server.
1. Click on VPN Server
2. Click Server Setup
3. Fill all Information for CA certificate Setup and click on generate button.
4. Fill server setup info and click on generate button.
5. Restart the service by click on green button and its status will be updated from stopped to running.
Step 2:-
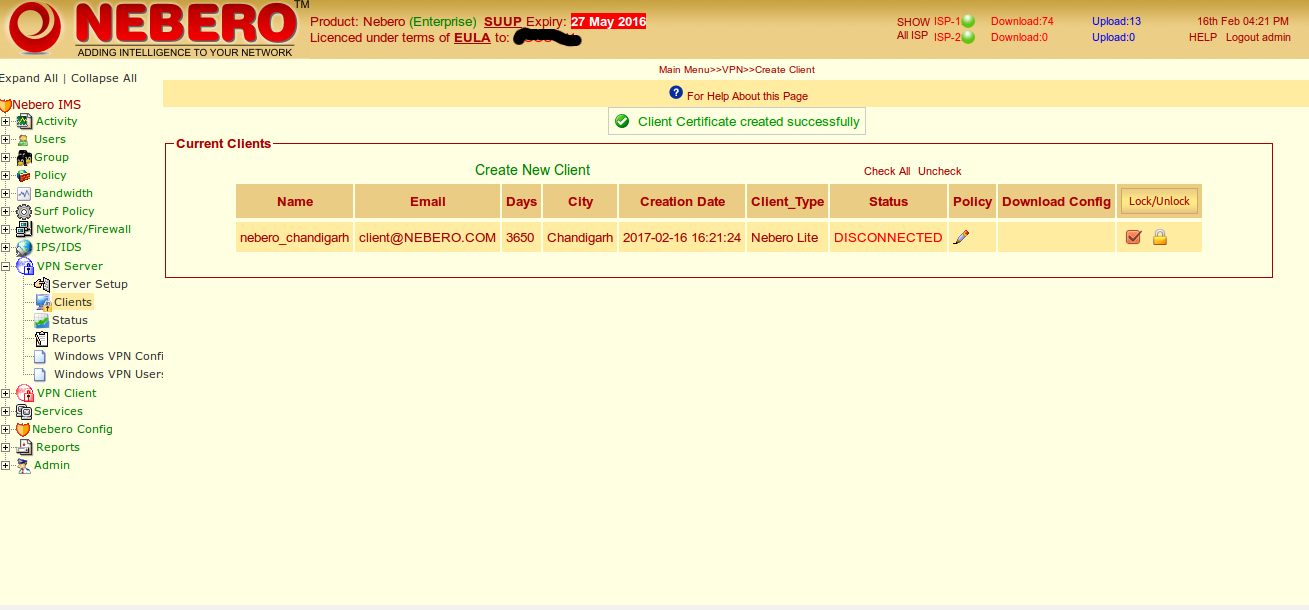
Creating VPN Client
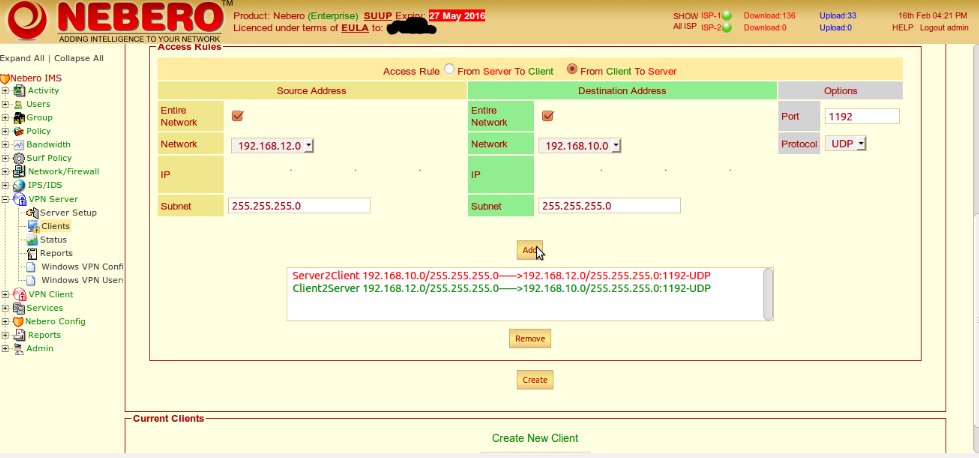
Click on VPN server.Go to the option clients and then create new client.Fill all the detail like shown in the image,also you need to fill the remote ip details in Network behind VPN client.
Fill the necessary details like access rule .From Server to Client and Client to serer.You can limit the ip that you want to access or you can choose the entire network.You can define port and protocols and after filling the information click on add button.After filling all the details then click on Create(Button).
Note:- Virtual IP will be assigned automatically.
Now client certificate created sucessfully and by default it's locked you needed to unlock it clicking lock unlock button
Step 3:
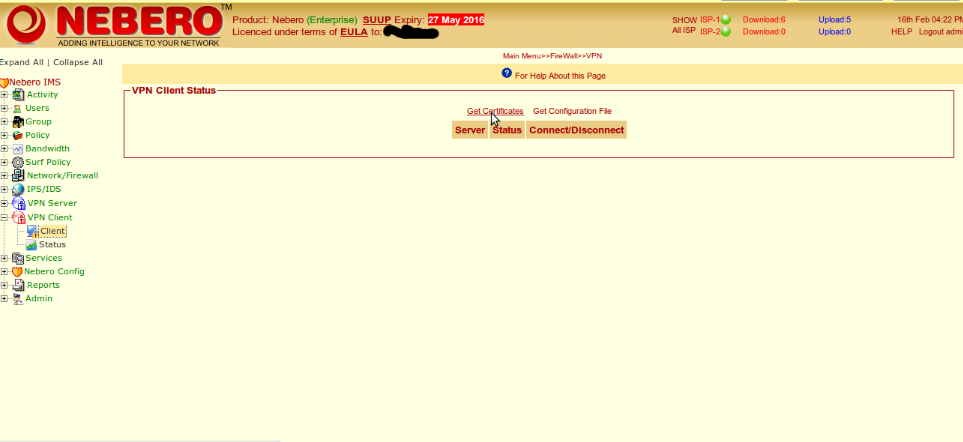
Login to Nebero panel of vpn client.
Click on vpn Client and then click on Client.After clicking on client click on Get certificate button.Fill all the detail's of vpn client as filled when vpn client was created.
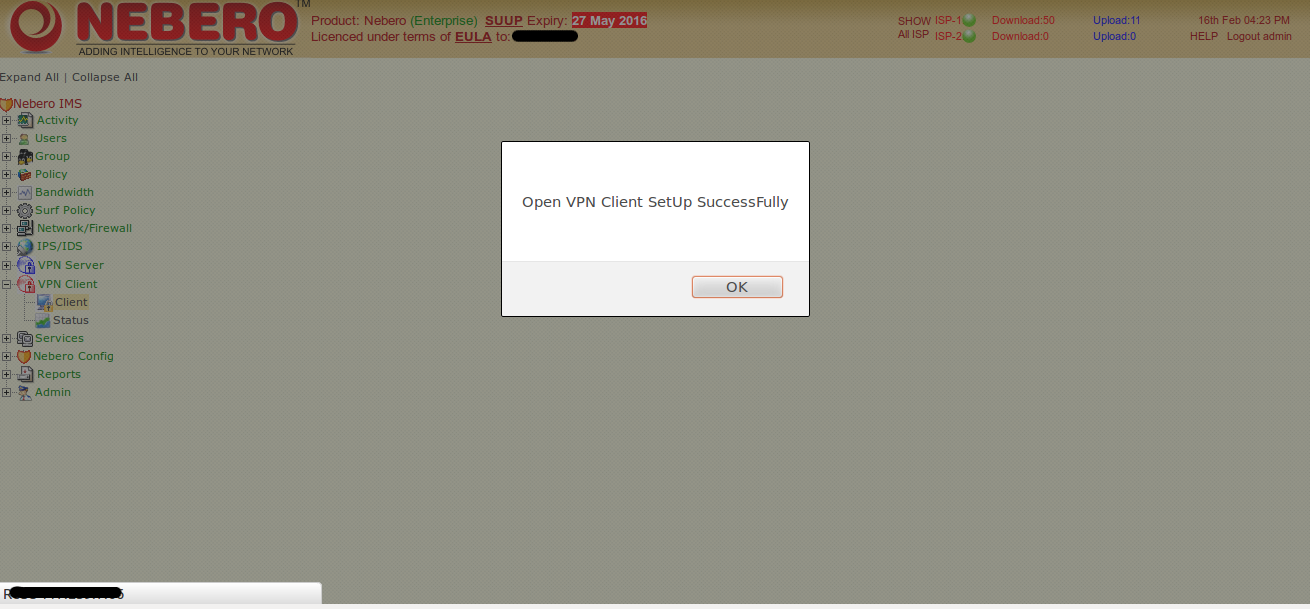
After all Information filled click on Get Now button,you'll get below message Open VPN Client Setup Sucessfully and click on OK button
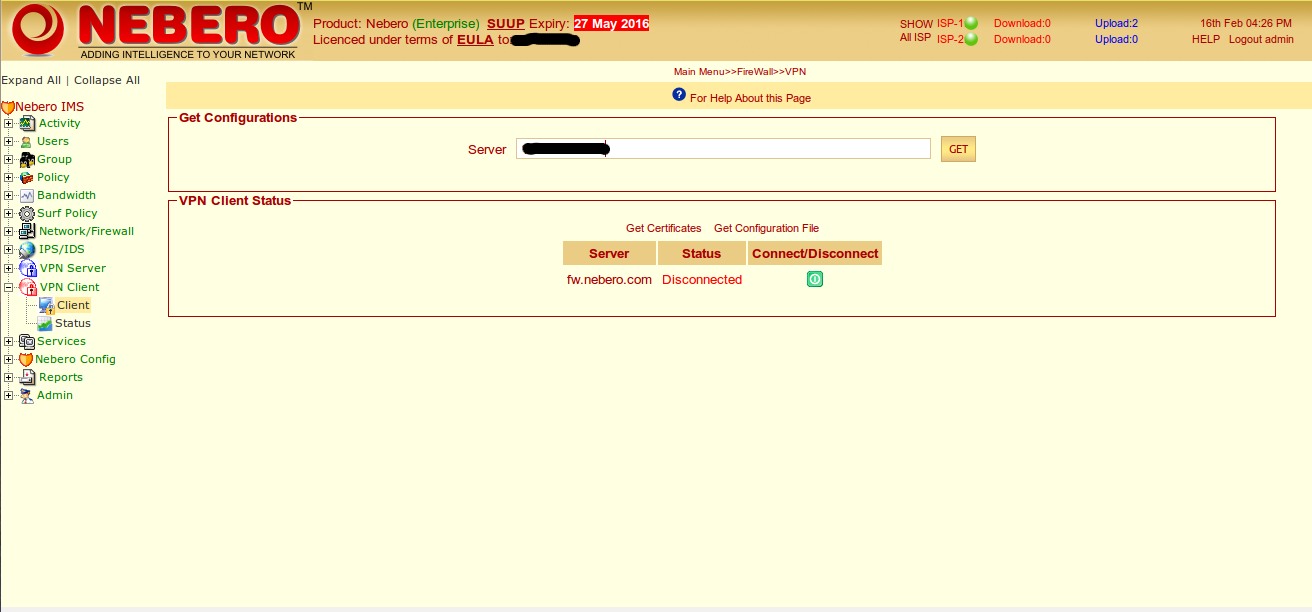
Now click on Get Configuration File below screen appear,Enter here VPN Server IP address and click on Get Button.
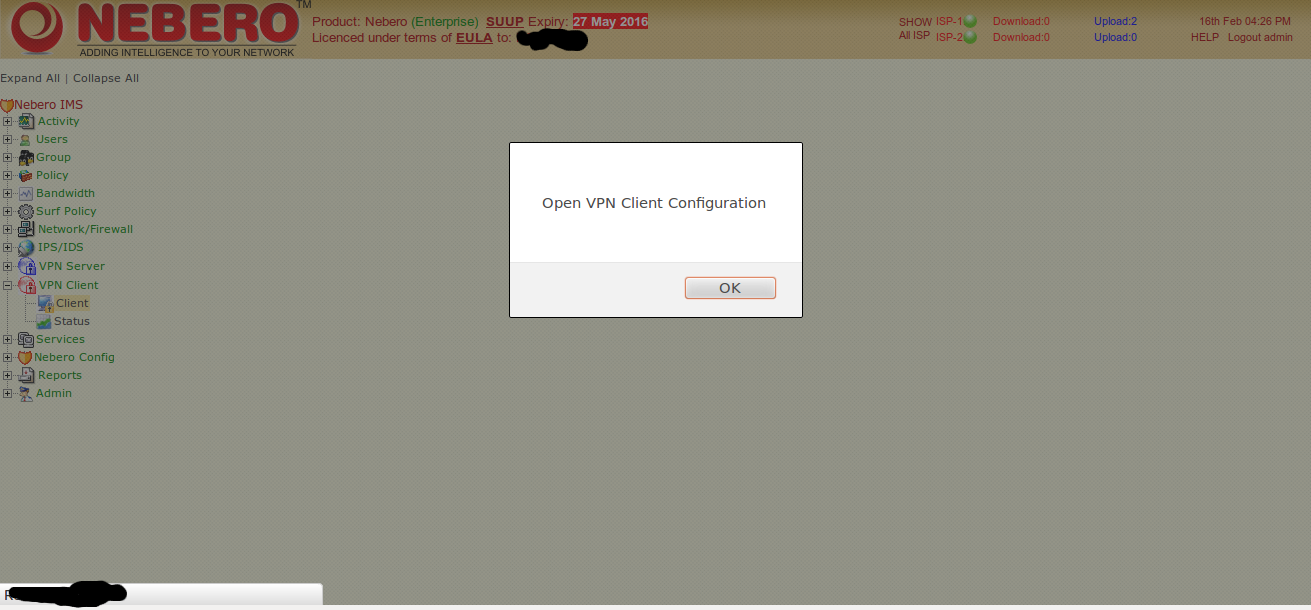
After click on Get Configuration File below screen show message Open VPN Client Configuraiton done sucessfully and click on Ok Button.
Cick on Connect/Disconnect Button to start and stop the service.
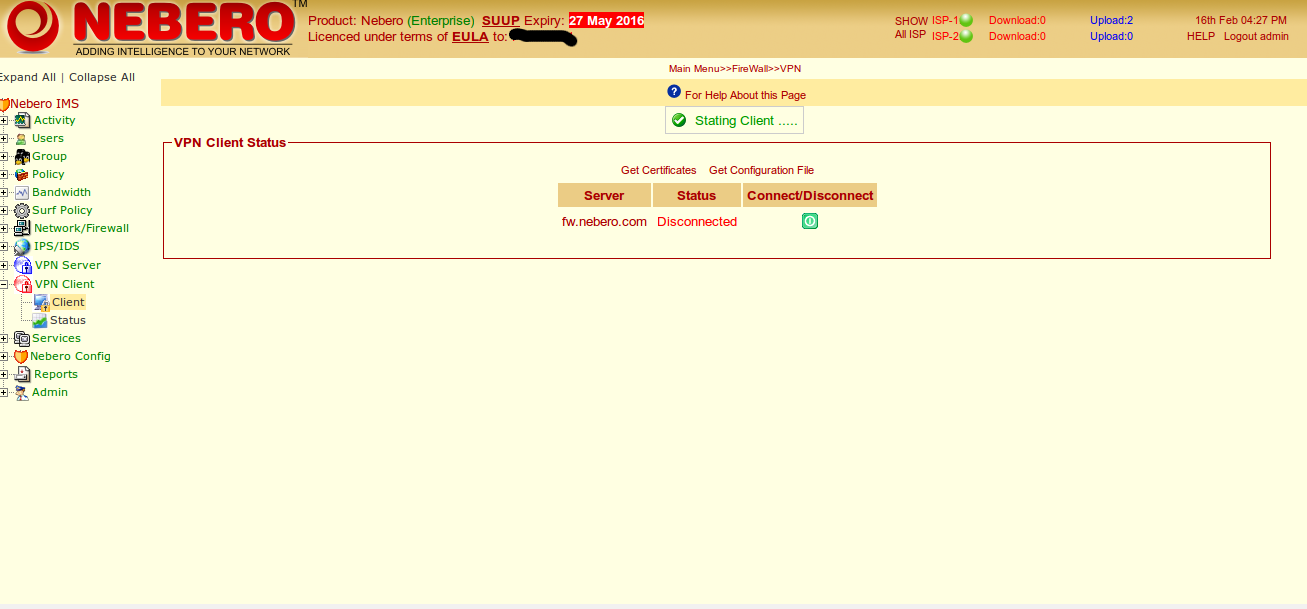
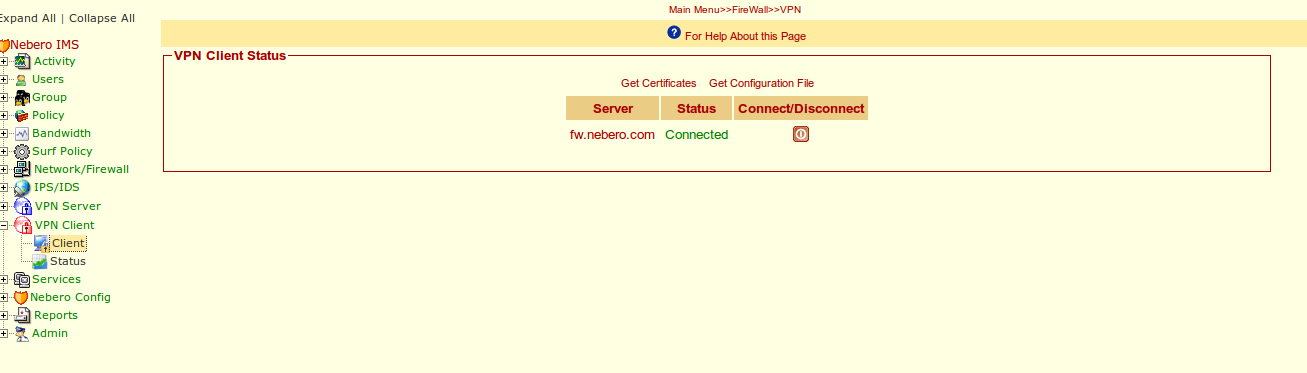
Now click on Client it's showing connected now
Also you can check the status of vpn client in admin panel under option
VPN client > Status
Posted on February 24, 2017 at 1:08 pm
Comments are closed
Categories:
The comments are closed.